This free tutorial will show you how to start a SCALABLE SPIRULINA PRODUCTION FARM that relies on simple, low cost, and easy to use techniques. Learn how to construct raceway ponds, grow, harvest & dry your fresh algae while maintaining optimal growth & vitality

STEP 1: Dig YOUR spirulina production RACEWAY POND
- First, find a spot for your raceway pond. Be sure to have plenty of sunshine and about 30% shade for the warmer days.
- To construct your raceway pond, dig an oblong shape, size between 10-300 meters long and 1-20 meters wide.
- Create ridges to divide your pond into parallel channels of about 1 meter wide each, and leave the edges open to allow water circulation, like in the image below. You can adjust the length of your pond according to how much space is available.
- The depth should be no more than 0.5 meters (or 1.64 feet). Be sure to install a drainage system so you can empty the pond for cleaning and maintenance.
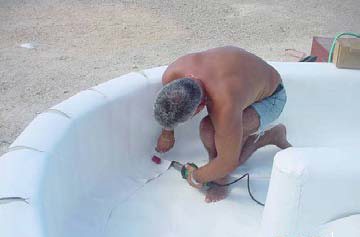
STEP 2: LINE YOUR RACEWAY POND
You can choose whether to line your spirulina production pond with clay, ceramics, or a pond liner made of durable plastic like PVC, which tends to be the popular choice for open pond farms. Ask your PVC supplier to sew the pond liner according to your measurements to significantly reduce the chances of leakage.
Need More Information on Raceway Ponds?
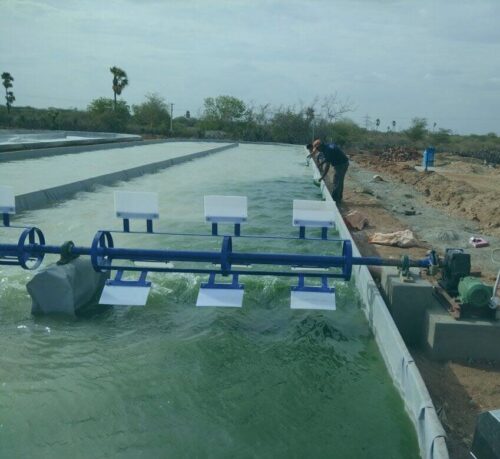
STEP 3: INSTALL A PADDLE WHEEL AERATOR
Paddle-wheel aerators are an excellent choice for medium and large spirulina production ponds as it inserts movement and oxygen into the water. There are many paddle-wheel designs that can be purchased as an off-the-shelf solution, or be built DIY to address your specific requirements. You can connect a number of paddle wheels to one central motor and place them in parallel ponds for higher efficiency.
The motor-driven paddle-wheel aerator should be backed into the water so that the axes are parallel to the water surface. The most effective way for this aerator to operate is when the paddles are turning at 108 rounds per minute (RPM), 21 inches deep. The paddles should turn toward the bank, forcing the water out into the open pond with an agitating action.
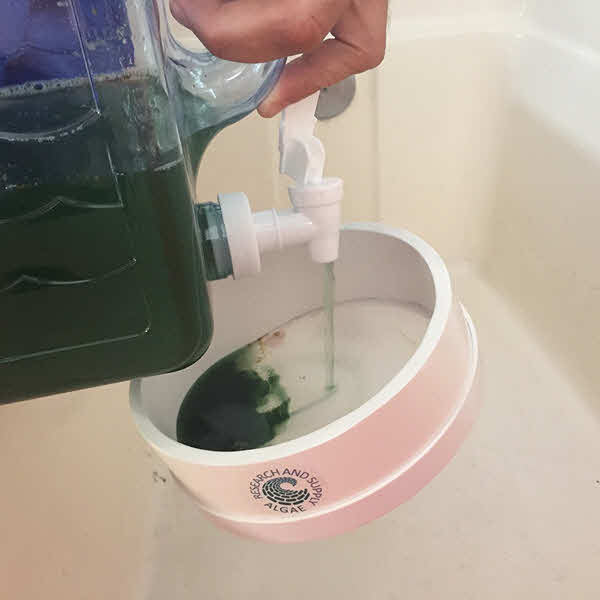
STEP 4: FILL YOUR RACEWAY POND WITH WATER
- Fill your spirulina production pond with water from a clean source, preferably natural spring water, rainwater or melted snow.
- Though not ideal, It’s actually OK to use tap water. Normally clean tap water will have trace minerals, as well as calcium which can be good for spirulina growth. You should however consider the levels of Chloride (<15), Fluoride (<20) and Hardness (<200) when calculating nutrient proportions.
- If you choose to use tap water and you don’t want to change nutrient proportions, let the Chloride evaporate for about 12 hours before adding the culture medium.

Well Done, You’re Almost There!
Now that your spirulina raceway pond is filled with water, use our calculator to know your exact water volume. This will help determine the mineral proportions when preparing the culture medium.
Step 5: CHOOSE A CULTURE MEDIUM for your spirulina
The culture medium is a liquid containing nutrients in which microorganisms like spirulina and many other types of algae are cultivated either for research or for commercial purposes. It is the nutrient mix on which your spirulina will feed in order to thrive and reproduce.
As spirulina doesn’t need organic materials for its reproduction, the debate over organic Vs. non-organic becomes irrelevant; and yet, you will come to learn that some minerals are better for your health than others. We strongly advise you to use our Spirulina glossary and educate yourself about the different formulas available, so you can make a wise decision.


Get All Calculators in A Single Bundle + Extras
Gain access to 4 popular spirulina culturing medium calculators, formulated and used by industry leaders
Get special member discounts for all digital products on our store
Publicize your spirulina-related business on our vendors directory
Access our global and local discussion groups on Whatsapp
Support our global activities and help make food greener
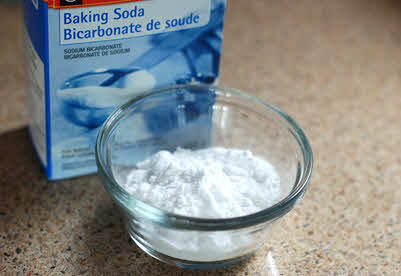
STEP 6: ADD NUTRIENTS TO YOUR RACEWAY POND
- Run the agitator to get the chemicals mixed up properly. This can either be done with a paddle wheel agitator or an air pump. Ideally, you’d have an electric timer to set the agitators on and off every 2 hours.
- Add the nutrients according to the recommended proportions of your preferred culture medium.
- The majority of formulas require 1 liter of mother culture for each 1000 liters of nutrients, after they were mixed in the water.
- When you’re done, run the agitator in cycles of 15 minutes every hour. Don’t add any other chemicals and continue to agitate for 10-12 days.
On day 12, your spirulina production pond should be concentrated with dark green spirulina, ready for harvest. To be on the safe side, remember to save some culture aside, in case something goes wrong.
Basic Ground Rules for maintaining healthy Spirulina

Gather your Lab Equipment
For best results, observe, track and measure key growth indicators such as cell morphology, pH, and concentration daily.
Maintain a Steady Temperature
Ideal Temperature is around 32-37 degrees Celsius (or 89.6-98.6 Fahrenheit). If weather is too cold, use a water heater.
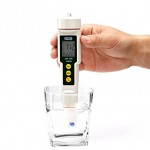
Always Keep the pH level around 10.3-10.5
Lower pH levels in your spirulina culture will attract invasive organisms; higher pH will cause over-salinity.
Prepare for Harvesting
You'll be surprised by how quickly Spirulina reaches full capacity. Make sure you have a harvesting mesh and cloths ready in advance!
STEP 7: HARVEST YOUR FIRST BATCH OF Fresh SPIRULINA Biomass
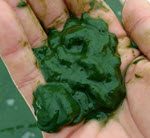
On the 13th day, your spirulina culture should appear dark green, with a relatively thick texture. You can now perform your first Spirulina harvest.
Place a 30-50 microns nylon mesh above your growth tank and pass the liquids through it until a thick jelly-like paste is formed on the top. Use a water pump to make this process easier, and place a piece of fabric at the edge of your hose to collect unwanted particles like leaves or insects.
Rake the wet biomass to the center of the mesh, then squeeze out the excess water, keeping only the freshly harvested spirulina. Repeat this process with fresh water to remove excess nutrients and pour the water back to the pond when you’re done.
Always remember to weigh your harvest!
Knowing how much spirulina has been harvested keeps you in control of the compensation nutrients. It will also help you understand and improve your production capability.
STEP 8: FEED THE CULTURE AFTER EACH HARVEST
We determine the amount of nutrients added after the harvest according to the weight of the dried spirulina yield. If you don’t want to dry your Spirulina, this can be calculated in a ratio of 10% of the biomass weight. For example, if you harvest 1kg of fresh biomass, the dried weight would be 100 grams. Each feeding formula has slightly different proportions. Use our After Harvesting Feeding Calculators to determine which nutrients to add and in what proportions.

Familiarize With Professional Jargon
Fluctuations in pH and Temperature, floating clumps and excess residue are just a few common problems you may encounter. Take the time to read, learn and educate yourself on common spirulina nutrients, strains and requirements so you’re always planning for the best but preparing for the worst.